The seven steps of the aluminum buckle ceiling installation process allow you to install the ceiling perfectly
The reason why the integrated ceiling is now more and more popular with everyone is because of its high overall performance and cost-effectiveness. The material of the integrated ceiling is also very large, and the most commonly used should be the aluminum buckle ceiling. The convenience and service life of suspended ceilings are inextricably linked to the existence of a good installation. So, today we have come to understand the installation process of the aluminum buckle ceiling , seven steps to allow you to easily fix the ceiling of the aluminum buckle plate . 
Aluminum buckle ceiling installation process
Bullet line
First, according to the horizontal line of the floor elevation, use the vertical vector of the ruler to reach the ceiling design elevation, play the keel position line on the ceiling board, and bomb the horizontal line of the ceiling elevation on the wall surface.
2. Install the main keel boom
After the ceiling has bombed the horizontal line of the elevation and the position line of the keel, the elevation below the boom can be determined. Then, according to the position of the keel and the distance between the hangers, one end of the suspension rod without bolts is fixed under the floor with expansion bolts. It is 6m steel. 
3. Install the main keel
After doing the first two tasks, match the nuts of the hanger rods, install the hangers on the main keel beforehand, and then insert the main keel of the assembled hangers into the corresponding hangers according to the position of the split line. The hanger bolts, then the lemon nut, then the main keel, and then install the connector; then adjust the elevation and straight; install the main keel attached to the hole, set up and connect the clip.
4. Install sub keel
According to the sub-keel sub-line that has already been shot, the triangle hanging pieces of the keel are placed and the wooden keel is used. The spacing between the sub keels is generally 600mm. The main keel spacing according to the design shall be used to suspend the sub-keel through the triangle pendant. On the main keel; If the length of the secondary keel requires multiple continuous extensions, the secondary keel can be used to connect the secondary keel while it is suspended and straightened and fixed. 
5. Install the aluminum strip
The specification of the general side aluminum bar is: 25mm*25mm, and the elevation of the ceiling is required to fix the aluminum bars around the wall with cement nails.
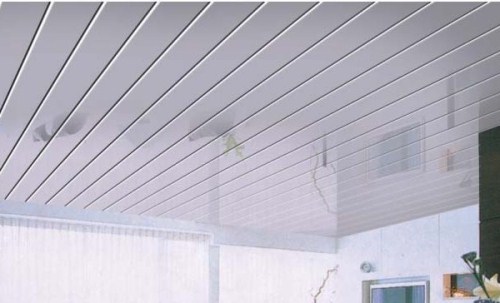
6. Install the aluminum buckle board
When installing the ceiling aluminum buckle plate, it should be pressed lightly in the order of the cuffs. After the square plate is completely snapped into the sub keel, it must be pushed tightly. It must not be barbarically forcibly loaded and unloaded. Card fixed side aluminum plate.
7. Install the lamps and vents
Generally, before the ceiling installation, the floor plans will be designed, so in the end it is to arrange the lamps and vents according to the ceiling plan layout; while installing the aluminum buckle plate, according to the size of the lamps and vents, open the holes and install the lamps. And ventilation. 
Editor's summary: The above is Xiaobian's introduction to the installation process of the aluminum buckle ceiling . After reading this article, everyone should have a more comprehensive understanding of the ceiling installation of the aluminum buckle . I hope this article will help everyone to install the aluminum buckle ceiling more perfectly.
Bamboo Wood Board Horse Stable Panel,Bamboo Wood Cutting Board,Bamboo Charcoal Wood Mirror Board,Nano Bamboo And Wood Fiber Wall Board
Linyi Hmbyan International Trading Co.,Ltd , https://www.hmbyandecor.com